
I hope everyone had happy holidays and that 2014 is off to a new start. After a year of stress and worry, my motto for 2014 is if no one else will laugh with me, then I will laugh alone!
My holidays were lovely. I got to spend a lot of time with family and friends. We were busier then expected, but I did manage to work on the Manor. I still had a few big construction projects to tackle, but since we were busy I spent my Christmas vacation working on projects that were not so dusty. Today I share the countess's bedroom which I finished today.


I made the curtains and the bedding for the room thinking they would be short projects...HA! You saw the chandelier in my last post in the Dining Room. After I looked at the pictures I decided it was too small for that room, but perfect for the bedroom. The longest project was the bedding.
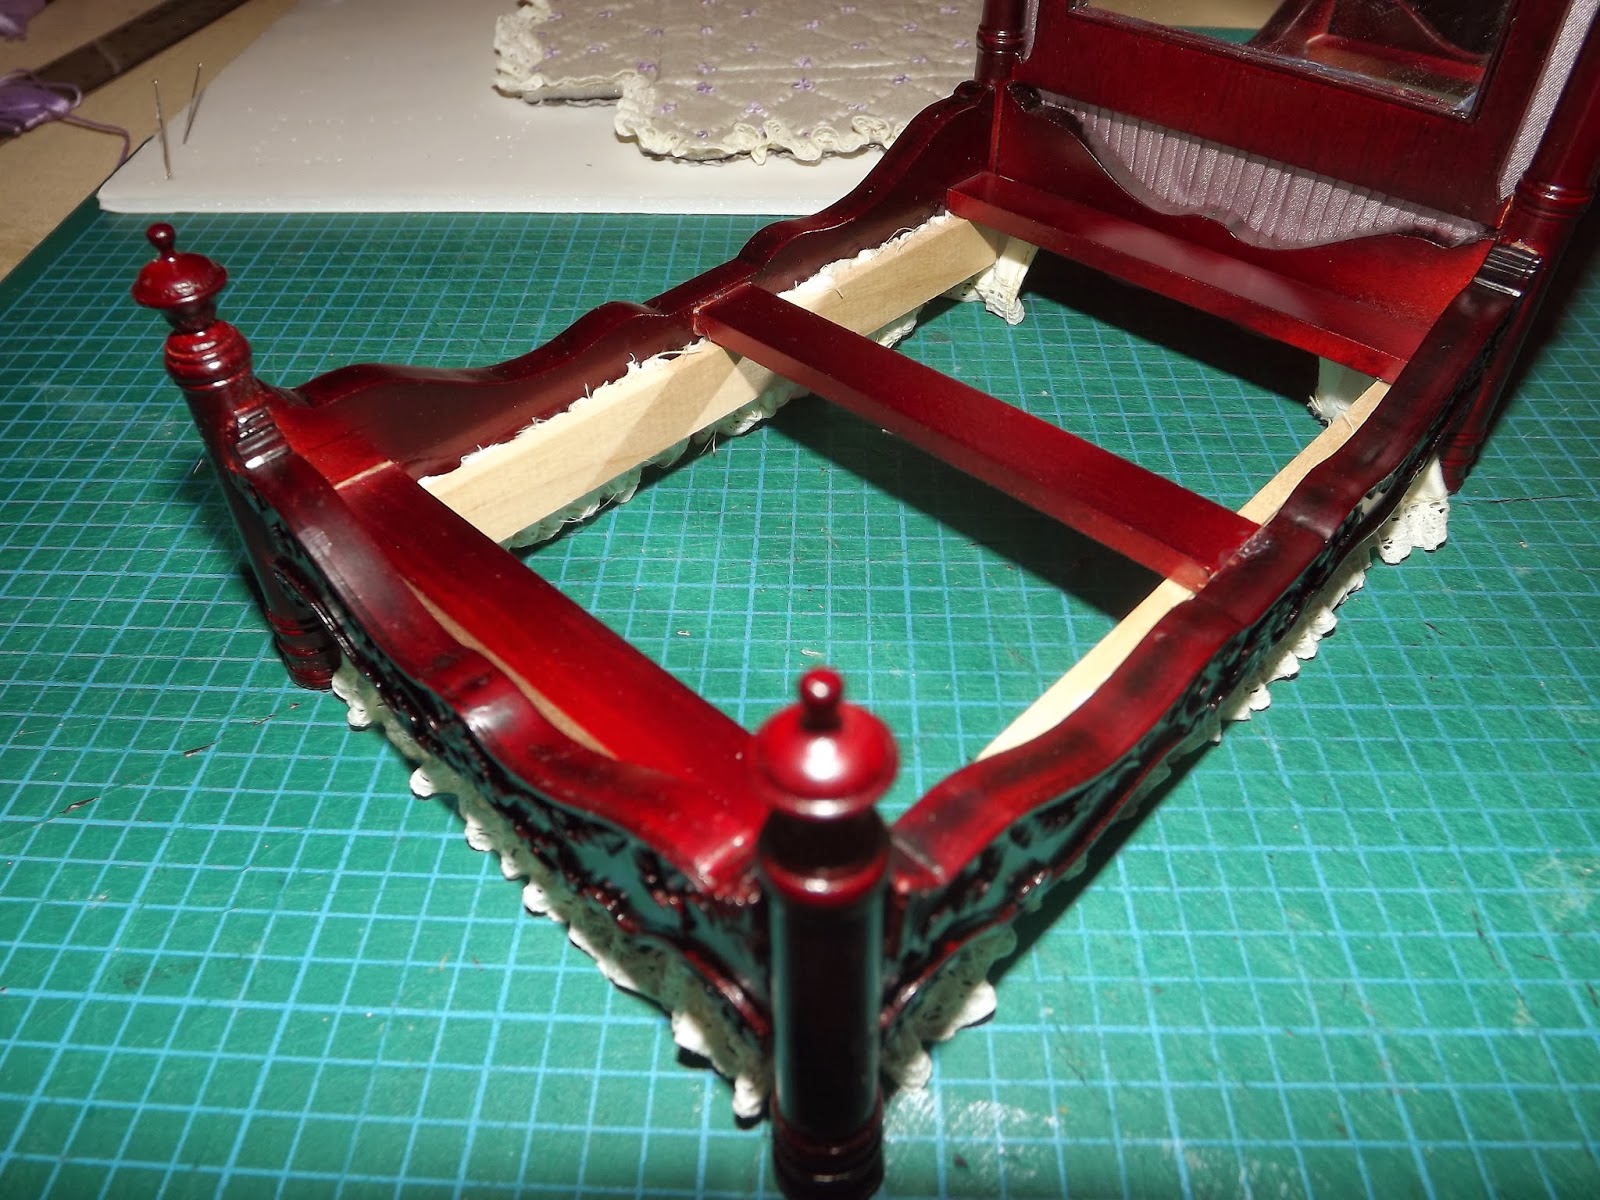
Here is a picture of the bed without any bedding I posted before Christmas:

My main tool was an article in a magazine I purchased years ago written by Williamson Walton Marble. I studied their instruction many times before I finally decided to give it a try.
The first step was making the pattern for the quilt that would fit the bed. In the next picture you can see the pattern on a piece of graph paper which shows where every stitch will go. I put the mattress on the graph paper and then calculated how low I wanted the sides to hang

In the above picture you see the paper pattern on the bottom left, the back cotton fabric on the bottom right with the stitches marked in pen, the piece of foam I used for the stuffing of the quilt on the top left, and at the top right is a piece of raw silk I used for the top of the quilt.
I layered the pieces to make the quilt: cotton fabric on the bottom with the pen marks side down, then the foam and finally the silk fabric right side up. I then made a simple basting stich with black thread on the main lines just to keep the pieces from moving:
 |
| back of the quilt. |
I then hand sewed all of the dotted lines. I pulled the thread through the 3 layers, made a very, very small stitch on the silk fabric, then came back through the 3 layers.
 |
| back of the quilt. The important thing is to push the needle through the center of each dot. |
 |
| top of the quilt: I chose a thread that matched the silk. If you look closer you will see the stitches on the top are very, very small to create the quilt effect. |

The 1/4 inch extra is there for the lace to be glued on. The next step was to gather the lace. I cut a piece of lace twice the length of the 3 sides of the bed (no lace against the headboard. I only had nylon lace so I could not pull on a thread to gather it. I hand sewed a 1/8 in stitch the entire length and then gathered it gently.

Once it was gathered to the right length I pined it down on some foamcore board with silk pins. To make the lace hang realistically I had to also pin the bottom of the lace into proper folds, then I hair sprayed it to death and let it dry.

The next step was to pin the quilt down on some foamcore, right side up, and using tacky glue and silk pins I put the lace into place

When the glue was dry I hand sewed the lace over the glue line. I did this for 2 reasons: 1- the glue had not taken perfectly in some areas and I was worried I might accidentally pull it off. 2- the gathered lace was not lying flat on the quilt and it did not look realistic. I thought of covering the edge with ribbon, but I thought it was busy enough and that would be overkill.
When the quilt construction was done I hand sewed the pillows the same way.

I used the same 1/8 inch foam I used for the quilt to make the decorative pillows and a 1/2 inch foam for the big pillow. The bolster is a plastic tube covered with fabric. Again I measured lace for each pillow twice as long as the 4 sides of the pillows, gathered it, pined it down, sprayed it, glued it, and finally sewed it.
I wanted to add a little detail to the bedding with French knots in lilac colored embroidery cotton string. I grouped the knots in 3 so it looked like little bunches of roses. At first I wanted red string to match the curtains, but the silk for the quilt was so pale I thought a softer color would look more elegant.

There is no way I can explain a French knot. I learned how to make them watching youtube videos. This was the most helpful: http://www.youtube.com/watch?v=bezNWJgBe0o . For my embroidery "roses" I wrapped the thread around my needle 2 times. The thread I used was made of 6 thick cotton strings. It was very difficult to get it through the needle head but well worth the effort.
Each rose was knotted in the back of the quilt but I noticed the knots kept coming undone so I covered each one with tacky glue. The 3 accent pillows looked a bit flat, so I tufted them with smaller French knots made with a thread that matched the silk.
With the top elements done I worked on the skirt. It is made using the same fabric as the back of the quilt with lace sewed on. First I machine sewed the lace to the bottom of the fabric wich was twice as long as the three sides of the bed base. I then hand sewed another gathering stitch to the top of the fabric, gathered it, pined it down, pined down the folds, and hair sprayed. Yes, a very repetitive demented process. I glued it using tacky glue to the underside of the bed
Because I had a very little height to glue the fabric to the bed base I put another line of glue on the skirt and added a strip of wood which was also glued to the cross beams of the bed to make sure the skirt did not come undone. I hope that is clear? You can see it in the above picture.
When that was dry it was time to assemble. The quilt sides must be glued to the sides of the bed to hang properly. I did not want to glue the quilt directly to the satin fabric that came on the mattress or onto the sides of the bed. I was afraid I might decided to remove it one day and damage the mahogany finish . I covered the mattress in the same fabric as the skirt and the back of the bed and I added would strips on the side of the mattress to which I glued the quilt

I added the wood strips because if I glued the quilt to the sides of the mattress it would not lie flat because the sides of the bed. The wood strips are the same width as the bed sides so the quilt could hang correctly. After all that down went the quilt
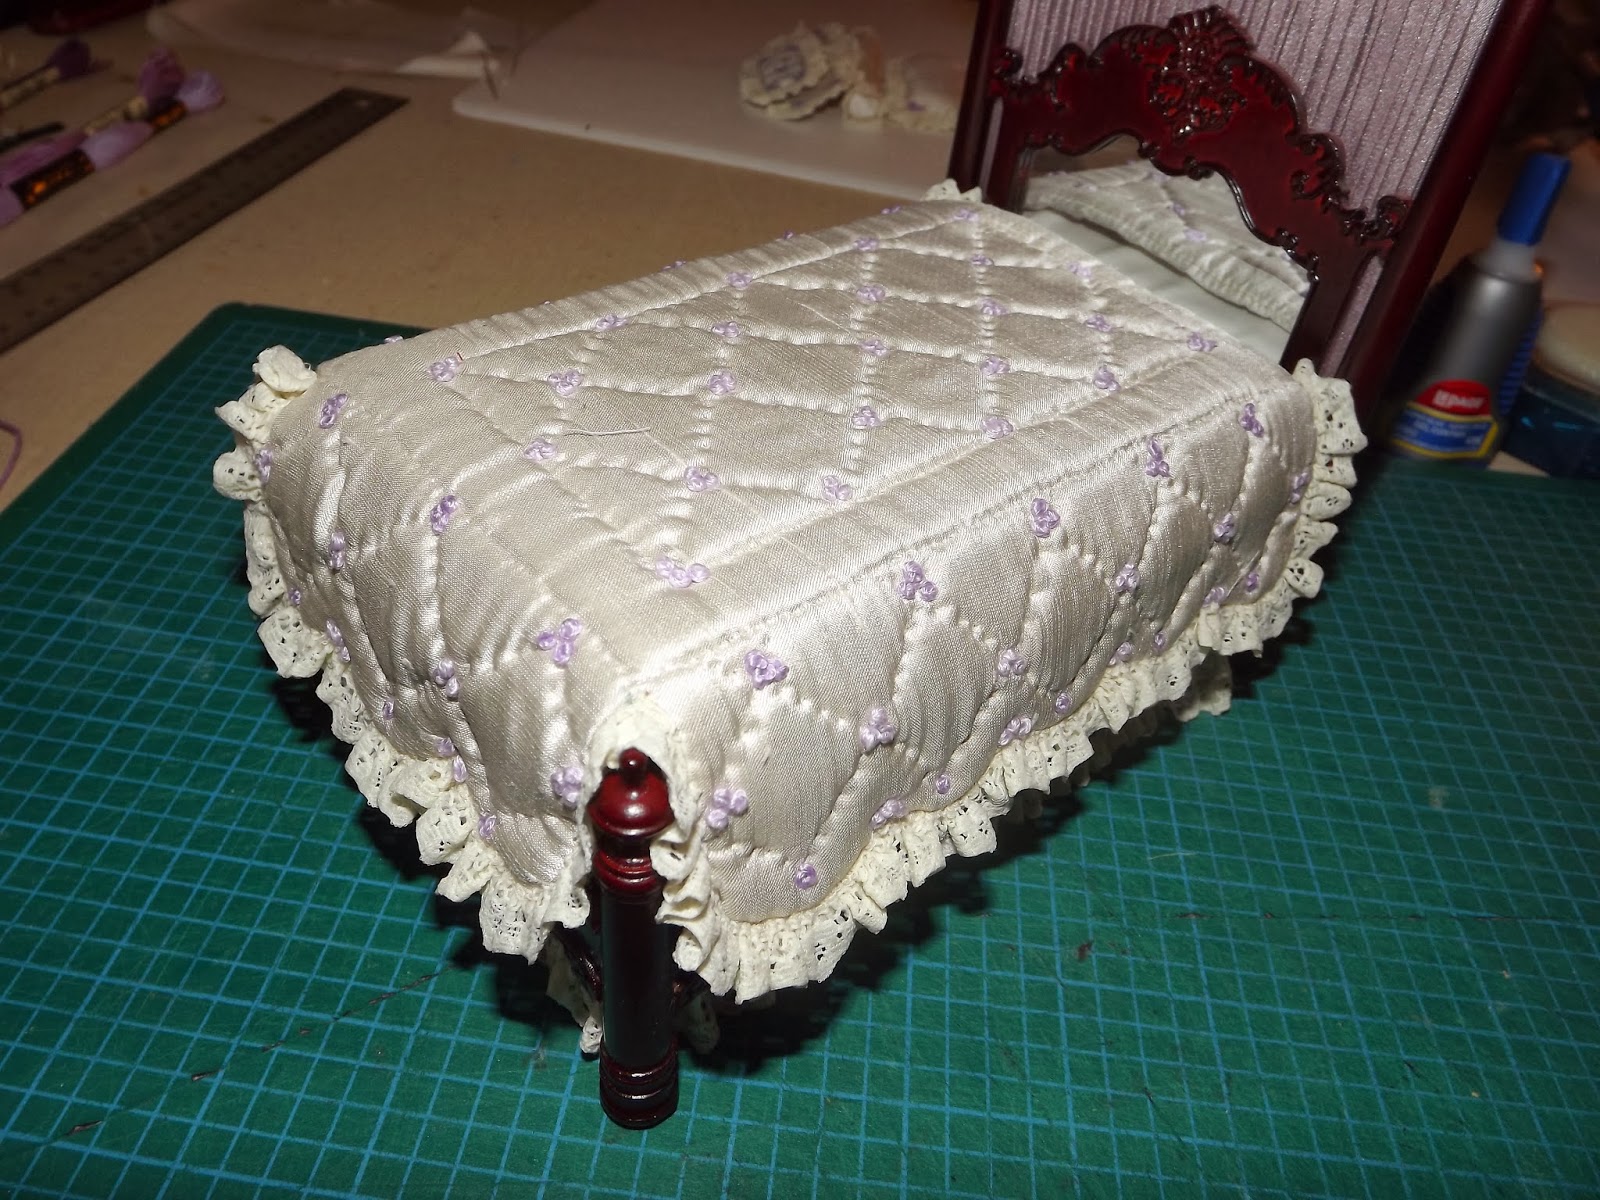
I just put a line of tacky glue and a few dots of super glue onto the wood strips and glued the quilt down. After that was dry I put the pillows in place...just put, not glued

And back the bed went into the bedroom. I think the countess will approve. I hope she does because the bedding took just under 30 hours to make.

The other finishing project for this room was the curtains over the windows. Here is what it looked like in a past post

Being a bear for punishment I decided I wanted Austrian shades for this room. I could not find any instructions on how to make them in miniature so I had to figure it out myself. I think I spent about 8 hours of trial time before I finally got to work on them.

In the above picture on the left you can see I pleated the red fabric with the Pretty Pleater and as per usual I cut and glued an illustration board backing for each pane to keep the folds perfectly in place. On the right side of the picture you see the start of the Austrian shade. I machine sewed a zigzag stich on the edges of the sheer fabric because the threads kept coming undone and caught in the gathering stitches. I then machine sewed 3 simple stitches for gathering the pane. I set my machine for a 1/8 inch stitch and lowered the tension.

In the above picture you see the gathered piece. I pulled on the 3 threads very gently. When they were the right length I knotted the ends of the strings and cut them off. I then took the red curtains, put them upside down on my work table and glued the Austrian shade down:

I was so careful gathering them, but one of the strings broke. That is why one is longer then the other. At this point I decided to live with it . I tried several alternatives, but in the end having the gathered line in the middle of the window is what looked best because I could shape the folds and glue them into place behind the red panels. I then took some illustration board and cut out boxes to go over the top of the curtains which I covered in fabric and gold trim.

I had some applique's from Unique Miniatures I painted white and gold which I wanted to glue over the tops of the window dressing. I used them to help shape the tops of the window boxes. And here they are installed

I also added some applique's to the over mantel to make the room look a bit more feminine. The original over mantel was too square and boxy.
And voila, my ladies bedroom is ready

Here is a close up of the amazing Delicate Daisy dresser set I commissioned from Julie dewar in place. I just love it

As always both families got together and bought me miniatures for Christmas. This year I got 2 Metropolitan chandeliers in antique bronze finish from the Getzan's to go in the Great Room

I think they are just perfect for the room. I mentioned that over the holidays I worked on smaller projects. Another one was the curtains for the Great Room.

The curtains for the nook went very well, except that the upholstery fabric I used was not natural fibers and fought me every step of the way. It did not stay down in the pleater, the glue did not stick on easily...but finally I got it done.

The curtains over the back door went the same, however I had one small obstacle to conquer. When they were in place I noticed the back structure showing on the side

I did not want to do anything fancy with the difficult fabric so I just built a simple box to cover it with faux finished lumber and molding trim


I made sure it just covered the exposed area. Thank you all so much for your great compliments on my last post. The dining room was indeed the Manor's dining room, not my real life one.
 |
I just wanted to mention a good friend of mine and a wonderful artist has finally started her own blog. It is the one and only Julie Dewar who made the Delicate Daisy dresser set for the countess's bedroom, the Imperial Cherry Blossom dinner set for my Chinese Tea Room and several other sets I have. You can see her blog at http://www.westwindsminiatures.blogspot.ca/ . She only has 2 posts, but believe me her artwork will amaze you!
And that is all for now my friends. I am not sure what I will tackle next...though work on the hell Ceiling will commence shortly. I hope you all have a wonderful week and I look forward to seeing all of your future posts. you are always such an amazing source of ideas, inspiration and kindness.
A big hug to all,
Giac